29 Using SSH keys
30 Using SSH keys
30.1 What are SSH keys?
In a high-performance computing (HPC) cluster, secure shell (SSH) keys are great for secure and convenient access. They provide a more robust authentication method than passwords, especially when dealing with automated tasks and frequent connections.
This guide will explain the basics of SSH keys, how to generate them using the modern ed25519 standard, and how to use them for file transfers and integration with Bitbucket/Git.
30.2 Understanding SSH Keys
SSH keys come in pairs: a private key and a public key.
Private Key: This key is kept secret on your local machine. Think of it like a very secure password. Never share your private key with anyone.
Public Key: This key can be freely shared. You will place your public key on the servers or services you want to access (e.g., the HPC cluster, Bitbucket or other computers you need to connect to in the network).
When you try to connect to a server using SSH, the server uses your public key to encrypt a challenge. Your local machine then uses your private key to decrypt this challenge, proving your identity without ever sending your private key over the network.
30.3 Generating SSH Keys with ed25519
The ed25519 algorithm is a modern, highly secure, and efficient standard for SSH keys. It’s recommended over older standards like RSA for its improved security properties.
To generate an ed25519 SSH key pair, open your terminal and run the following command:
ssh-keygen -t ed25519 -C "your_email@example.com" Let’s break down this command:
ssh-keygen: The command-line utility for generating, managing, and converting authentication keys.-t ed25519: Specifies the type of key to create, in this case, aned25519key.-C "your_email@example.com": Adds a comment to your public key. It’s good practice to use your email address here, as it helps identify the key later, especially when managing multiple keys.-f ~/.ssh/<host>_ed25519: you can also specify a file name for the ssh key generated, when you do this you will need create theconfigif it doesn’t exist in.ssh(~/.ssh/config) and add an entry to that tells the ssh tool which key to use when connecting to that specific host. The config entry should be something like:Host <host> Hostname <host> User <user> Port 22 PreferredAuthentications publickey IdentityFile "~/.ssh/<host>_ed25519"Note: on Windows your .ssh folder is
C:\Users\<user>\.sshand your config full path is:C:\Users\<user>\.ssh\config
After running the command, you’ll be prompted for a few things:
Enter file in which to save the key (/home/youruser/.ssh/id_ed25519): You can press Enter to accept the default location, which is usually
~/.ssh/id_ed25519for the private key and~/.ssh/id_ed25519.pubfor the public key.Note: on Windows your .ssh folder is
C:\Users\<user>\.sshand your public key full path isC:\Users\<user>\.ssh\id_ed25519.pubEnter passphrase (empty for no passphrase): It is recommended to set a passphrase for your private key. This adds an extra layer of security, as your private key will be encrypted on your local machine. You’ll be prompted for this passphrase whenever you use the key. It adds a minor step, but the security benefit is significant if someone gains access to your computer. Because they won’t be able to use your SSH key without the passphrase.
Enter same passphrase again: Confirm your passphrase.
Once completed, you will have two new files in your ~/.ssh/ directory:
id_ed25519: Your private key.id_ed25519.pub: Your public key.
30.4 Integrating with Bitbucket/Git
SSH keys are the recommended way to authenticate with Git hosting services like Bitbucket, GitHub, or GitLab. This allows you to push and pull code without repeatedly entering your username and password.
Add your public key to Bitbucket:
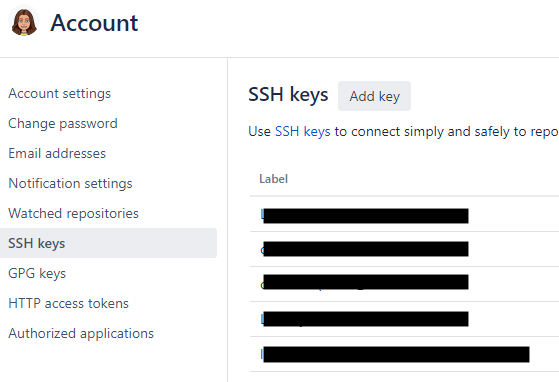
Log in to your Bitbucket account.
Go to Manage Account (usually accessible by clicking your avatar in the top right corner).
Click on SSH keys (on the left).
Click Add key (button in the upper right).
Paste the entire content of your
~/.ssh/id_ed25519.pubfile into the Key field.Give your key a descriptive Label (e.g., “My Laptop SSH Key”).
Click Save.
Configure Git to use SSH: When cloning repositories from Bitbucket, make sure to use the SSH URL .
- So something like this:
ssh://git@company.domain:7999/<your_projectname>/<your_repository>.git
- So something like this:
If you’ve already cloned a repository using HTTPS, you can change its remote URL to use SSH:
cd /path/to/your/git/repo

git remote set-url origin git@company.domain:7999/<your_projectname>/<your_repository>.git
Then, when you git pull or git push, Git will attempt to use your SSH key for authentication. If you set a passphrase for your key, you’ll be prompted for it once per session (or until ssh-agent stores it).
30.5 Using SSH Keys with other computers
This section is primarily used to help get your laptop connected to Sasquatch, BitBucket, or a VM but you will likely be using this very rarely outside of access to Sasquatch. It’s valuable to look at these examples even if just to understand how ssh keys can be shared between different systems in practice.
To use your newly generated SSH key to access another computer through ssh, you need to add your public key to the ~/.ssh/authorized_keys file in that computer.
- Copy your public key to the computer: The easiest way to do this initially (if you don’t already have passwordless access) is using
ssh-copy-id:
ssh-copy-id -i ~/.ssh/id_ed25519.pub your_username@<computer_name> You will be prompted for your password for the your_username@<computer_name> account. After successful authentication, ssh-copy-id will append your public key to the ~/.ssh/authorized_keys file on the new computer.
If `ssh-copy-id` is not available or you prefer to do it manually:

-   **Display your public key:**
cat ~/.ssh/id_ed25519.pub Note: On Windows use this:
more C:\Users\<user>\.ssh\id_ed25519.pub
Copy the entire output, which starts with ssh-ed25519 and ends with your comment.
- Log in to the computer using your password:
ssh your_username@<computer_name> - Create the
.sshdirectory if it doesn’t exist and set correct permissions:
mkdir -p ~/.ssh
chmod 700 ~/.ssh - Append your public key to
authorized_keys:
echo <PASTE_YOUR_PUBLIC_KEY_HERE> >> ~/.ssh/authorized_keys chmod 600 ~/.ssh/authorized_keys Note: Replace <PASTE_YOUR_PUBLIC_KEY_HERE with the content you copied from id_ed25519.pub.
- Test your SSH connection: After adding your public key, you should be able to log in to the computer without a password (if you didn’t set a passphrase for your key) or by entering your passphrase (if you did).
ssh your_username@<computer_name> 30.6 Convenient File Copying example with scp
SSH keys make file transfers much more convenient and secure.
30.6.1 Using scp (Secure Copy)
scp is used to copy files between hosts on a network.
- Copy a file from your local machine to the another computer:
scp /path/to/local/file.txt your_username@<computer_name>:/path/to/destination/ - Copy a file from the another computer to your local machine:
scp your_username@<computer_name>:/path/to/remote/file.txt /path/to/local/destination/ 30.7 Conclusion
SSH keys are a cornerstone of secure and efficient interaction within HPC clusters and with external services like Bitbucket. By understanding how to generate, manage, and utilize them, you can significantly streamline your research workflows, ensuring both security and convenience. Remember to always keep your private key secure and protect it with a strong passphrase.